I still remember the first time I felt that sharp, nagging pain just below my kneecap. It didn’t seem serious at first, but over time it got worse. That’s when I learned I was dealing with patellar tendinopathy, also known as jumper’s knee. It made running, squatting, and even walking down stairs painful. Like many athletes, I ignored the early signs, and that delay only made recovery harder.
What helped me most was understanding the condition and following a structured rehabilitation plan. Through proper diagnosis, activity modification, and specific strengthening exercises, I was able to relieve the pain and rebuild strength in my knee. The key was a gradual approach focused on eccentric loading and long-term tendon health.
If you’re struggling with similar knee pain or suspect patellar tendinopathy, keep reading. I’ll walk you through everything you need to identify it early and treat it the right way.
What Is Patellar Tendinopathy and Why It Matters

When I was first told I had patellar tendinopathy, I had no idea what it meant. I just knew my knee hurt every time I jumped or ran. Patellar tendinopathy, often referred to as jumper’s knee, is an overuse injury that affects the patellar tendon, which connects the kneecap (patella) to the shinbone (tibia). This tendon plays a major role in straightening the knee during activities like jumping, sprinting, or squatting.
The condition is common in athletes who participate in high-impact sports like basketball, volleyball, and track. Ignoring the symptoms can lead to chronic pain and even tendon degeneration. That’s why identifying and treating it early is critical. I learned that it’s not something that heals overnight, but with consistent rehab and smart loading strategies, recovery is absolutely possible.
Also Read: 6 Common Foot and Ankle Problems: Causes and Treatments
Common Symptoms and How to Identify the Condition
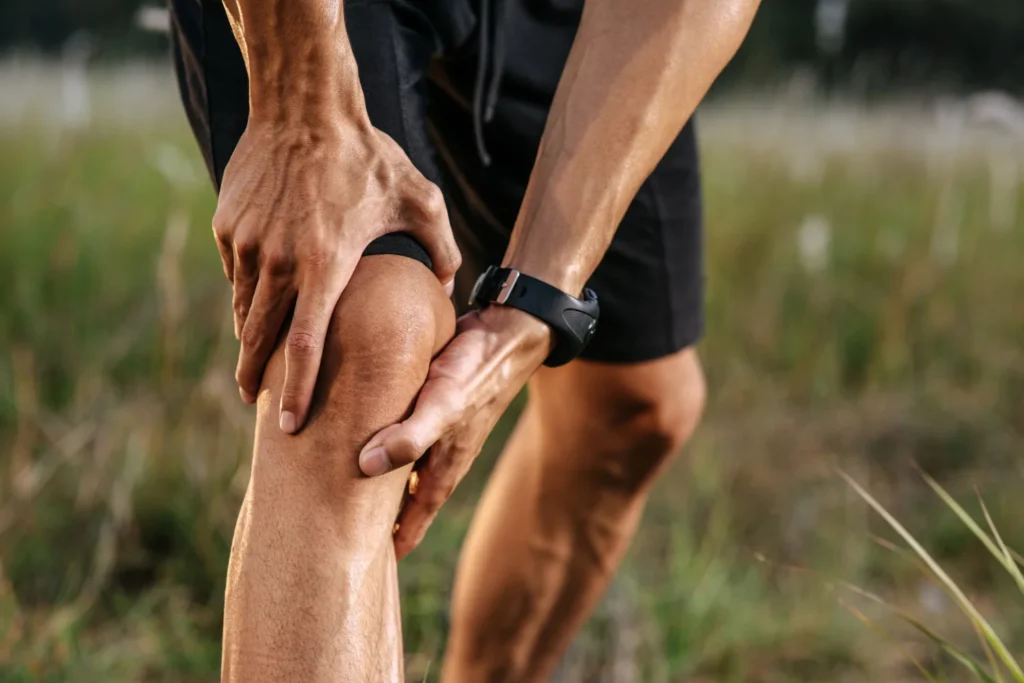
In my experience, patellar tendinopathy starts off subtly and then gradually worsens. I noticed tightness and mild pain just below my kneecap at first especially after workouts. Over time, that pain became more intense and stuck around even after rest.
Here are the most common symptoms to look out for:
- Pain located at the bottom of the kneecap (patellar apex)
- Stiffness during or after physical activity
- Pain when walking downstairs or squatting
- Tenderness to touch along the patellar tendon
- Decreased performance in jumping or sprinting
- Tightness in the quadriceps
Also Read: Runner’s Knee Recovery Time – How Physiotherapy Can Help You Get Back on Track
Pain Grading Table:
| Pain Level | Description | Impact on Activity |
|---|---|---|
| Mild | Discomfort after activity | No effect on performance |
| Moderate | Pain during and after activity | May reduce performance slightly |
| Severe | Pain disrupts activity and daily movement | Performance significantly impaired |
Recognizing these symptoms early allows for timely intervention, which can reduce recovery time significantly.
Main Causes and Risk Factors You Should Know
Understanding why patellar tendinopathy happens helped me avoid future flare-ups. Here’s what I’ve learned are the most common causes and contributing risk factors:
Overuse from Repetitive Stress:
- Jumping or sprinting without proper rest
- Playing on hard surfaces for long periods
- Sudden increases in training load
Biomechanical Imbalances:
- Flat feet or poor foot mechanics
- Misaligned knees or hips
- Leg length discrepancies
Muscle Imbalances or Weakness:
- Weak glutes or hamstrings
- Overactive quadriceps
- Tight hip flexors
Training Errors:
- Skipping warm-ups and cooldowns
- Inadequate recovery between sessions
- Poor technique during landing or squatting
Equipment Factors:
- Worn-out shoes with poor cushioning
- Inappropriate footwear for sport type
Knowing these risks allowed me to correct my technique and adjust my training environment to support long-term recovery.
Also read: Why Women Suffer More From Chronic Pain [How to Find Relief]
Diagnosis and Clinical Assessment Techniques

The moment I stepped into the clinic, my physiotherapist started a detailed assessment. Accurate diagnosis is the foundation of effective rehabilitation, and here’s how it typically works:
1. Clinical History Review
- Onset, location, and duration of pain
- Aggravating and relieving factors
- Training history and load patterns
2. Physical Examination
- Palpation along the tendon for tenderness
- Functional movement tests like single-leg squats or step-downs
- Strength testing of the lower limb
3. Imaging Techniques (if needed)
- Ultrasound: Detects tendon thickening or degeneration
- MRI: Used for more complex or unresponsive cases
Here’s a table to summarize clinical tools used:
| Assessment Type | Purpose | When Used |
|---|---|---|
| Manual palpation | Detect pain location and swelling | Always during initial exam |
| Functional tests | Evaluate performance under stress | For diagnosis and progress tracking |
| Ultrasound/MRI | Confirm tendinopathy or tears | If conservative treatment fails |
Correct diagnosis sets the stage for the right rehab plan.
Early-Stage Management and Pain Reduction
The first thing I had to do was stop aggravating the injury which meant modifying my training and activity levels. Early-stage management focuses on pain control and tissue healing.
Strategies I Followed:
- Relative rest: I reduced impact-based activities but didn’t stop moving completely.
- Ice therapy: Applied for 15 minutes post-activity.
- NSAIDs: Helped reduce inflammation, used only for a short duration.
- Patellar strap: Offloaded tension on the tendon during light activity.
- Isometric quad holds: These reduced pain without stressing the tendon.
Remember, the goal at this stage is not to stop moving but to move smartly.
Key Rehabilitation Exercises and Loading Protocols
I used to think stretching was enough, but recovery from patellar tendinopathy depends on strategic loading, especially eccentric exercises.
Here’s the exercise progression I followed:
Early Stage:
- Isometric leg extensions (5 sets of 45-sec holds)
- Wall sits (3 rounds x 30 seconds)
- Straight leg raises
Mid Stage:
- Eccentric decline squats on a 25° board
- Step-downs with controlled tempo
- Resistance band glute bridges
Late Stage:
- Bulgarian split squats
- Single-leg hops
- Depth jumps
Exercise Loading Table:
| Exercise | Type | Goal | Reps/Sets |
|---|---|---|---|
| Isometric wall sits | Isometric | Pain relief, tendon stability | 3×30–45 sec |
| Eccentric decline squats | Eccentric | Tendon remodeling | 3×15 daily |
| Glute bridges (banded) | Activation | Hip control, knee offloading | 3×10–15 |
| Bulgarian split squats | Functional load | Sport return preparation | 3×8–12 per leg |
Consistency is more important than intensity. It’s a slow but powerful process.
Also Read: Exercises for Hip Pain Relief: Step-By-Step Guide
Complete Rehabilitation Timeline and Progression Guide
My rehab didn’t follow a strict timeline, but having a stage-based roadmap helped me stay motivated. Here’s a general guide:
| Rehab Phase | Timeline | Key Goals |
|---|---|---|
| Acute/Phase 1 | Weeks 1–2 | Pain control, isometric strength |
| Sub-acute/Phase 2 | Weeks 3–6 | Eccentric training, mobility |
| Strengthening | Weeks 6–10 | Glute/core balance, controlled loading |
| Functional Rehab | Weeks 10–14 | Plyometrics, sport-specific movement |
| Return to Sport | Week 14+ | High-level movement, performance readiness |
Note: These timelines vary based on severity and athlete type.
Tracking your progression with small goals can keep you accountable and help avoid plateaus.
Preventing Recurrence: Long-Term Knee Health Tips
Once I recovered, my focus shifted to prevention. These changes to my routine helped me stay pain-free:
Strength Maintenance:
- Continue eccentric squats 2–3x weekly
- Prioritize hamstring and glute work
Mobility & Recovery:
- Daily foam rolling and hip flexor stretching
- Incorporate dynamic warm-ups and cooldowns
Training Load Management:
- Increase volume or intensity by no more than 10% per week
- Schedule rest days or light recovery sessions
- Alternate between high-impact and low-impact training
Equipment Upgrades:
- Invested in shoes with shock absorption
- Used knee support during high-impact drills
Staying disciplined with these habits has kept my tendon strong and pain-free.
When to Return to Sports and Performance Readiness
It’s tempting to jump back into action too soon but I learned the hard way that returning without meeting certain criteria risks re-injury.
Return-to-Sport Checklist:
- No pain during or after functional movements
- Equal strength in both legs (90% symmetry)
- Able to perform single-leg hops without discomfort
- Clearance from your therapist or sports physician
Performance Testing Tools:
- Single-leg hop test
- Triple jump test
- Isokinetic strength test
It’s not just about being pain-free. It’s about being strong, mobile, and reactive under pressure.
Also Read: Effective Treatments for Chronic Knee Pain: From Diagnosis to Relief
Final Thoughts on Treating Patellar Tendinopathy
Recovering from patellar tendinopathy taught me patience, discipline, and trust in the rehab process. From early pain to jumping pain-free again, each stage brought its own challenges and lessons. Whether you’re a competitive athlete or an active weekend warrior, this condition doesn’t have to hold you back.
Listen to your body, follow a progressive loading plan, and stay consistent. Most importantly, don’t ignore those early signs of discomfort addressing them early can save you months of pain later. With the right strategy, healing is not just possible it’s probable.
FAQ About Patellar Tendinopathy
What are the first signs of patellar tendinopathy?
You’ll usually feel pain or tightness just below the kneecap during activity. It may start mild but worsen with jumping or prolonged use.
Can patellar tendinopathy heal on its own?
While minor cases may improve with rest, full recovery often requires a structured rehab plan. Ignoring it may lead to chronic pain.
How long does patellar tendon rehab take?
Most recoveries take 8–12 weeks, though severe cases may take 3–6 months. Progress depends on consistency and injury stage.
Is it OK to exercise with patellar tendon pain?
Some pain-free movement is helpful, especially isometrics. But high-impact activity should be avoided until rehab progresses.
What are the best exercises for jumper’s knee?
Eccentric decline squats, isometric quad holds, step-downs, and glute bridges are among the most effective rehab exercises.